Yoga has been used for centuries as one of the greatest ways to keep our bodies healthy. It helps to increase flexibility, relax our bodies, and ease pain. Many people have begun to use its wonderful benefits to help rid themselves of the pain and discomfort attributed with sciatica.
If you suffer from this affliction, try these 12 yoga poses you can do every day to ease nerve pain and sciatica.
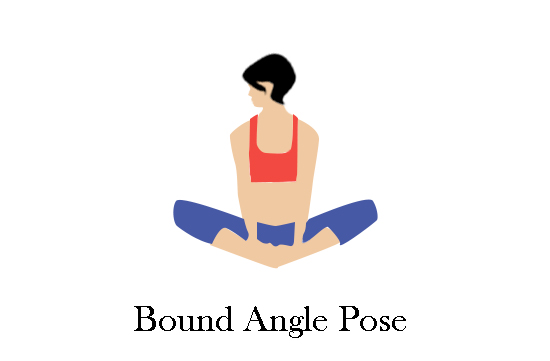
1. Bound Angle Pose
- Sit with your back straight and your legs straight in front of you.
- Exhale and bend your knees, pulling your heels towards your pelvis and dropping your knees to the floor.
- With the soles of your feet touching and your heels as close to your pelvis as they can go, grab the big toe of each foot with your first and second fingers. Make sure your knees are still close to the floor.
- Hold and keep your back straight while taking a few deep breaths. Then inhale while unbending your knees and bringing them back to their original position.
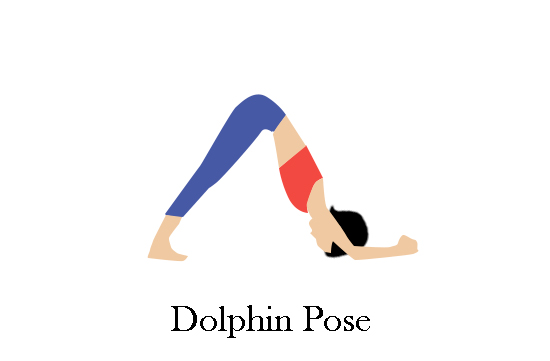
2. Dolphin Pose
- Rest on the floor on your hands and knees. Keep your knees directly below your hips and your wrists below your shoulders.
- Curl your toes, exhale, and lift up your knees. Keep your forearms resting on the floor.
- Leave your knees slightly bent and your heels off the floor. When it’s comfortable, begin to push your heels back into the floor and straighten your knees. Make sure that your back is straight. If you can’t straighten it then bend your knees slightly.
- Hold this pose while taking a few deep breaths, then exhale and drop your knees back to the floor.
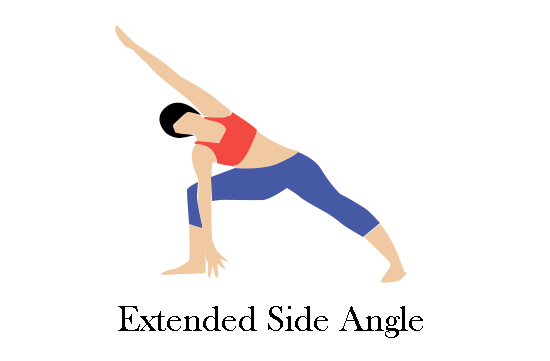
3. Extended Side Angle Pose
- Stand with your back straight and your feet wide apart. Point your left foot forward while your right foot points to the right.
- Raise your arms parallel to the floor, keeping your shoulders down.
- Exhale, and bend your right leg so that the knee is directly above the ankle.
- Place the palm of your right hand on the floor in front of your right foot. Lift your left arm up, pointing to the sky.
- Lift your head to look toward your left arm. Stay in this pose while breathing deeply. Then inhale while you lift yourself back up and repeat on the other side.
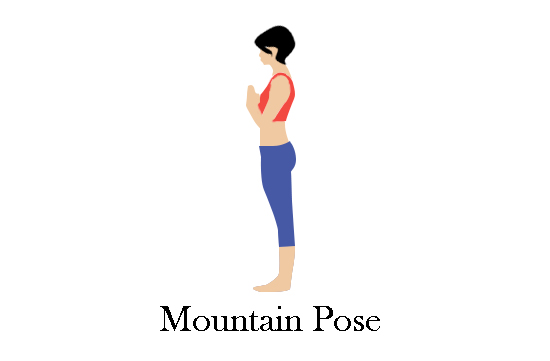
4. Mountain Pose
- Stand with your back straight, heels apart, and big toes touching slightly.
- Keep your thighs firm and raise your kneecaps without tensing your stomach. Lift your inner ankles slightly so that you’re on your toes.
- Lower your shoulders and lengthen them. Keep your arms by your sides, palms facing forward, and your head looking straight ahead of you.
- Hold while breathing gently.
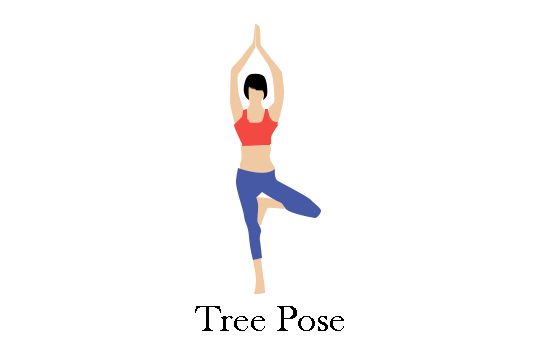
5. Tree Pose
- Start with mountain pose.
- Bend your right leg and bring the sole of your foot to your inner left thigh with your toes pointing downward.
- Once you’ve found your balance, bring the palms of your hands together at your chest.
- Hold for several deep breaths, then exhale and lower your leg.
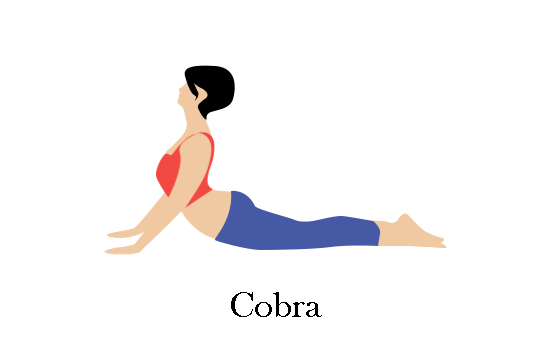
6. Cobra Pose
- Lie with your stomach, legs, and feet all flat on the floor with your toes pointed outward.
- Keep your elbows directly below your shoulders and place your palms on the floor. Then lift up your chest from the floor, hugging your elbows to your sides.
- Keep your pelvis and legs firmly on the floor, take a few deep breaths, then exhale and drop your chest slowly back to the floor.
7. Fire Log Pose
- Sit on the floor with your legs crossed and your back straight.
- Put your left foot under your right leg, then stack your right leg on top of the left with your foot on top of the knee.
- Hold your hands comfortably on your legs and bend forward slightly at the hips, keeping your back straight.
- Stay in this pose while taking several deep breaths.

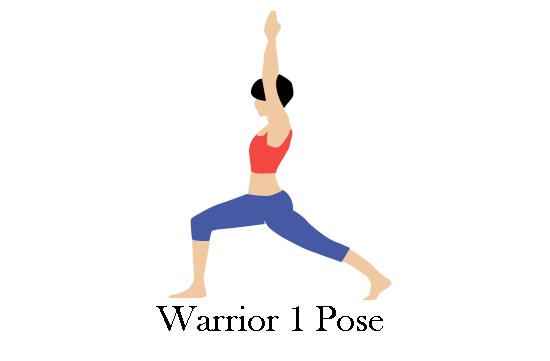
8. Warrior 1 Pose
- Start in mountain pose, then exhale and bring your feet wide apart.
- Keep your left foot facing forward while your right foot points to the right. Bend your right knee so that it’s in line with the ankle.
- Raise both your arms to the sky, then turn your body to the right with your head also facing to the right.
- Breathe deeply and hold, then repeat on the other side.
9. Warrior 2 Pose
- Start in warrior 1 pose.
- Move your arms so that they’re parallel to the floor, keeping your shoulders lowered.
- Stay in this pose while breathing deeply, then repeat on the other side.

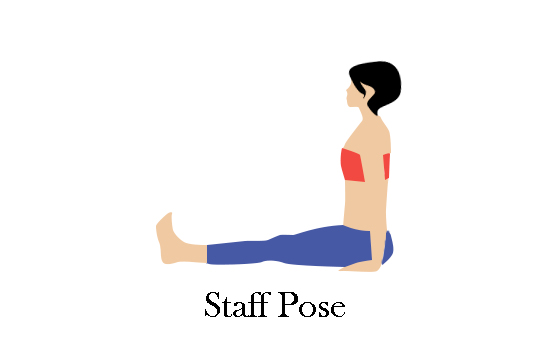
10. Staff Pose
- Sit on the floor with your back straight and your legs straight out in front of you.
- Place your arms by your sides and rest your palms on the floor just slightly behind you.
- Keep your back and knees straight, hold the pose while breathing deeply.
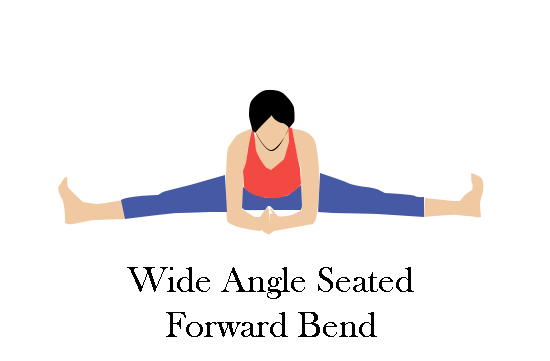
11. Wide Angle Seated Forward Bend
- Start in staff pose, then open your legs to a 90-degree angle, keeping your knees straight and pointing towards the ceiling. Push your legs apart as far as they can go from here.
- Slowly walk your hands forward on the floor between your legs with your back remaining straight.
- Reach your arms as far as they can go without bending your back, hold, then inhale and lift yourself back up.
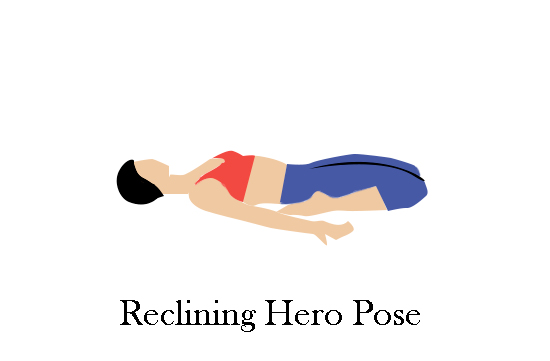
12. Reclining Hero Pose
- Rest yourself on your knees with your lower legs hugging the sides of your thighs, toes pointing outward.
- Exhale while slowly leaning back into the floor, keeping yourself balanced with your hands. Move on to rest on your forearms instead of your hands, and then onto your elbows.
- When you can, move your hands and rest your lower back on either a blanket or cushion.
- Hold this pose and take several deep breaths, then slowly raise yourself back up, using your hands for support.
Take a few minutes out of your day each day to do these poses. You’ll find that with time, they’ll be easier to do as your flexibility increases. Soon, you’ll start to see how great these poses really are for aiding sciatica and nerve pain.
Do you know someone who sufferers from sciatica? Send this article to them and share the amazing benefits that yoga has to offer.
Written by Mary Wright
Mary Wright writes from the heart, unafraid to dive into the deepest human emotions. Her essays and short stories transform ordinary moments into literature that lingers.
View all posts by this author